Best Headlight Restoration Kit: 9 Top Picks for Clearer Lenses in 2026
Foggy, yellowed headlights aren’t just an eyesore. They cut your night visibility by up to 80%, creating a real safety risk on dark roads. The good news? The right headlight restoration kit fixes this in under an hour, without a trip to the mechanic.
This guide ranks the best options across every category — ceramic coating, sanding systems, and wipe-on kits — so you can match the right product to your headlights’ actual condition.



Best Headlight Restoration Kits at a Glance
Not all headlights need the same treatment. Light surface haze calls for a quick wipe-on solution. Heavy yellowing and deep oxidation demand abrasive sanding stages and a UV-protective clear coat to keep results lasting.
Here’s a fast-reference summary of the top picks:
| Kit | Best For | Method | UV Protection |
|---|---|---|---|
| Cerakote Ceramic | Best Overall | Wipe-on ceramic | Yes — ceramic coat |
| Sylvania | Long-lasting UV | Wipe + UV coat | Yes — included |
| 3M Restoration System | Heavy oxidation | Multi-stage sanding | Limited |
| Mothers NuLens | DIY beginners | Drill-powered | Moderate |
| Turtle Wax Restorer | Budget pick | Wipe-on | Basic |
| Rust-Oleum | Clear-coat focus | Sanding + coat | Yes |
| Meguiar’s Heavy Duty | Faster results | Wipe + compound | Basic |
You can also browse third-party comparisons of headlight cleaning kits at Autoweek, which covers several of these brands with real-world context. If you’re planning a full exterior detail session, pairing this with the best water hose for car wash makes the prep stage much smoother.
Cerakote Ceramic Headlight Restoration Kit — Best Overall
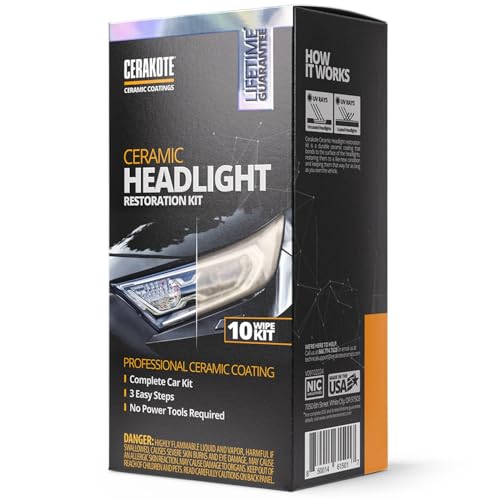
The Cerakote headlight restoration kit consistently tops expert roundups, and it earns that position. It delivers professional-grade ceramic protection in a simple wipe-on format that most drivers can complete in 30 minutes.
Ceramic coating creates a harder surface barrier than standard clear coats. That means UV rays, road grime, and moisture hit the ceramic layer first — not the plastic lens underneath. The result holds noticeably longer than most wipe-on alternatives.
Key Features
- Ceramic coating bonds to plastic lens surface for durable UV protection
- Single wipe-on application requires no sanding or drill attachment
- Works on lenses with light-to-moderate oxidation and yellowing
- Compact kit includes everything needed for both headlights
Pros and Cons
Pros
- Fastest professional-grade results without specialist tools
- Ceramic layer resists UV degradation longer than standard coats
- Minimal prep time makes it ideal for busy car owners
- Repeatedly ranked as a top pick by automotive review sites
Cons
- Less effective on severely oxidized or deeply pitted lenses
- Higher price point than wipe-on budget options
Pricing
Mid-to-upper price range. Costs more than basic kits but less than professional detailing services.
Our Verdict
Cerakote is the strongest all-rounder available today. If your lenses are moderately hazy or yellowed and you want the longest-lasting result with the least effort, this kit wins outright. Skip it only if your headlights have serious physical damage.
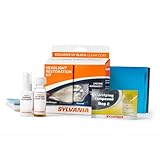
Sylvania Headlight Restoration Kit — Best for Long-Lasting UV Protection
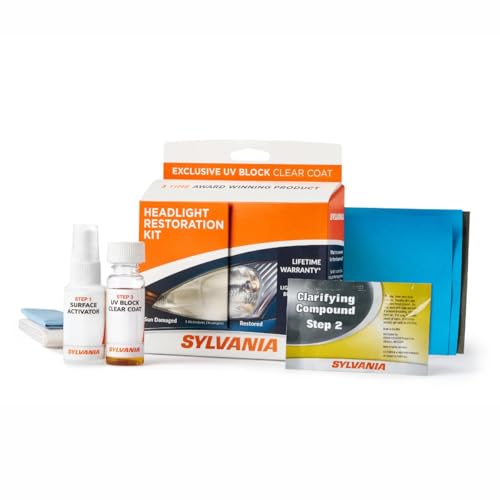
UV degradation is why restored headlights go yellow again within months. The Sylvania headlight restoration kit addresses this directly with a dedicated UV-block clear coat as the final step.
This matters more than most buyers realize. The shine after sanding looks great. But without a proper UV seal, that clarity fades fast under sun exposure.
Key Features
- Multi-step process includes UV clear coat as a finishing layer
- Sanding stages remove moderate-to-heavy oxidation effectively
- UV block coat extends restoration results significantly versus no-coat kits
- Designed for DIY use with clear step-by-step instructions
Pros and Cons
Pros
- UV protection layer is the standout feature for long-term durability
- Strong performance on faded lenses that have lost their factory coat
- Good value when durability matters more than application speed
- Widely recommended by detailing communities for lasting results
Cons
- Multi-step process takes longer than wipe-on alternatives
- Sanding stages require patience and careful technique
Pricing
Mid-range pricing. Offers strong long-term value relative to its cost.
Our Verdict
Choose Sylvania if you’ve had other kits fade within a season. The UV coat is the reason this kit holds its results longer than most. Best for drivers in high-sun climates or those who want to minimize how often they repeat the job.
3M Headlight Lens Restoration System — Best for Heavy Oxidation

Some headlights are beyond what a wipe-on kit can fix. Deeply yellowed, heavily pitted, or badly neglected lenses need real abrasive cutting — and the 3M headlight restoration system delivers exactly that.
This is the most aggressive kit on this list. It’s also one of the most effective when lenses are in bad shape.
Key Features
- Progressive sanding disc sequence removes deep oxidation in stages
- Drill-driven application speeds up abrasive cutting versus hand sanding
- Polishing compound follows sanding to restore lens clarity
- Developed by 3M’s abrasives division, which manufactures for professional detailers
Pros and Cons
Pros
- Outperforms wipe-on kits on severely oxidized headlights
- Drill attachment reduces physical effort during sanding stages
- 3M’s abrasive quality is consistent and well-tested across industries
- Results on neglected lenses frequently outperform less aggressive kits
Cons
- Requires an electric drill — not included in the kit
- UV protection is limited compared to Cerakote or Sylvania
- More prep and masking effort required to protect surrounding paint
Pricing
Mid-range price. Factor in the cost of a drill if you don’t already own one.
Our Verdict
For heavily yellowed or long-neglected headlights, the 3M system delivers results that gentler kits simply can’t match. Plan to apply a separate UV sealant afterward for longer-lasting clarity.
Mothers NuLens Headlight Renewal Kit — Best for Easier DIY Use
First-time restorers often make the mistake of choosing kits that are too aggressive or too complicated. Mothers NuLens avoids both problems.
It’s drill-powered but designed with simplicity in mind. The system uses a single polishing ball attached to any standard drill, which makes the technique more forgiving than multi-disc sanding progressions.
Key Features
- Single power ball design works with any drill for consistent pressure
- Chemical compound restores moderate haze without multi-stage sanding
- Kit is compact and reusable across multiple restoration sessions
- Regularly appears in hands-on test roundups for ease and finish balance
Pros and Cons
Pros
- Beginner-friendly process reduces the risk of over-sanding
- Reusable components offer better long-term value per use
- Works well on lenses with light-to-moderate yellowing
- Consistent results without requiring specialist technique
Cons
- Less effective on deep oxidation compared to multi-stage systems
- UV protection is moderate — consider a topcoat addition afterward
Pricing
Mid-range with good per-use value due to reusable design.
Our Verdict
Mothers NuLens is the safest choice for first-timers. You’ll get solid results on moderately hazy lenses without risking the scratching errors that come with more aggressive sanding kits.
Turtle Wax Headlight Lens Restorer Kit — Best Budget Pick
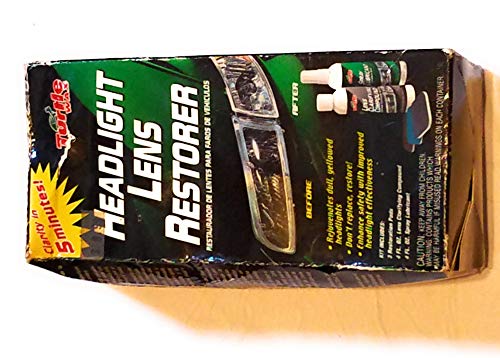
Budget kits often disappoint. Turtle Wax is an exception — within its limits.
It’s designed for light surface haze and early-stage yellowing. Expect good results on mildly oxidized headlights, and manage your expectations on anything worse.
Key Features
- Affordable wipe-on format requires no drill or sanding equipment
- Chemical compound removes light surface oxidation quickly
- Includes a UV protection step to extend results modestly
- Accessible format makes it a solid first attempt for new DIYers
Pros and Cons
Pros
- Lowest barrier to entry — no tools needed beyond what’s included
- Fast application works well for lightly hazy or recently degraded lenses
- Turtle Wax’s brand reliability at a budget-friendly price
- Good short-term option before investing in a more aggressive kit
Cons
- Not effective on yellowed or heavily oxidized lenses
- UV protection is basic — results may fade within a few months
- Shine may look uneven on lenses with patchy or deep damage
Pricing
Budget-tier pricing. The most affordable option on this list.
Our Verdict
Buy Turtle Wax if your lenses are mildly hazy and you need a quick, low-cost fix. Don’t expect long-term durability or results on seriously degraded headlights.
Rust-Oleum Headlight Restoration Kit — Best for Clear-Coat Protection
Rust-Oleum built its reputation on protective coatings. That expertise carries directly into its headlight kit, which prioritizes the protective clear coat as the main selling point.
This is the right pick if your primary concern is preventing future degradation rather than just restoring today’s clarity.
Key Features
- Clear-coat finishing step provides strong surface protection after polishing
- Sanding stages handle moderate oxidation before the protective coat applies
- Rust-Oleum’s coating chemistry is developed for long-term surface protection
- Kit includes all steps from sanding to final protective application
Pros and Cons
Pros
- Clear coat protection is noticeably stronger than basic wipe-on finishes
- Good option for drivers who park outdoors in high-UV environments
- Familiar brand with strong quality control across its product line
- Multi-step process delivers a thorough restoration before coating
Cons
- Process takes more time than single-step wipe-on kits
- Initial clarity may be slightly behind Cerakote on very hazy lenses
Pricing
Mid-range. Strong value for drivers prioritizing protection over speed.
Our Verdict
Rust-Oleum suits drivers who want protection built into the restoration, not bolted on afterward. Pair it with thorough masking, and you’ll get a well-finished result that holds up well.
Meguiar’s Heavy Duty Headlight Restoration Kit — Best for Faster Results

Speed matters. Meguiar’s Heavy Duty kit is designed for drivers who want visible improvement in a single short session without complex multi-step processes.
It targets moderately oxidized lenses and delivers results faster than sanding-based systems.
Key Features
- Heavy-duty compound cuts through moderate oxidation in one application
- No drill required — hand application keeps the process straightforward
- Polishing pad included provides even compound distribution
- Meguiar’s compound technology is trusted across professional detailing circles
Pros and Cons
Pros
- One of the fastest application times among non-wipe-on kits
- Strong results on moderate oxidation without multi-stage sanding
- No drill or specialist tools needed
- Meguiar’s is a widely trusted brand in automotive detailing
Cons
- Not designed for severely oxidized or heavily pitted lenses
- UV protection is basic — a separate sealant is worth adding afterward
- Results may not last as long as ceramic or UV-coat kits
Pricing
Mid-range pricing. Good value for the speed and convenience it offers.
Our Verdict
Meguiar’s Heavy Duty is ideal for drivers who want results fast without sacrificing quality on moderately oxidized lenses. It won’t replace a full sanding system on badly degraded headlights, but for most everyday use cases, it delivers.
How to Choose the Right Headlight Restoration Kit
Getting this choice wrong wastes money and time. Match the kit to your headlights’ actual condition — not just the packaging claim.
The headlight restoration buying guide at Consumer Reports breaks down key selection factors in detail. Here’s a practical framework to apply before you buy.
Assess Your Headlight Condition First
- Light haze or early yellowing: Wipe-on kits (Cerakote, Turtle Wax) handle this well
- Moderate oxidation: Compound-based kits (Meguiar’s, Sylvania) restore clarity effectively
- Heavy yellowing or deep oxidation: Multi-stage sanding systems (3M, Rust-Oleum) are necessary
Don’t guess. Hold a flashlight behind the lens in daylight. If you see yellow, cloudy plastic, that’s oxidation. If you see surface scratches or pitting, you need abrasive cutting.
Kit Types at a Glance
Wipe-on kits apply chemical compounds without sanding. They work fast and suit light damage. They rarely produce lasting results on serious oxidation.
Hand-sanding kits use progressively finer abrasive pads to cut away oxidized plastic. They’re effective on moderate to heavy damage. They take more effort and require masking the surrounding paint.
Drill-driven kits speed up the sanding stage. They’re best for heavily damaged lenses where hand pressure alone won’t remove enough oxidized material.
Ceramic and UV-coat kits add a protective layer after restoration. This is the most important factor for long-term results. Without a UV seal, lenses re-oxidize within months.
Match the Kit to Your Skill Level
First-timers should start with wipe-on or single-ball drill kits. Multi-stage sanding with a drill requires care to avoid creating visible swirl marks or cutting through the lens entirely.
Time is also a real factor. A full 3M sanding system takes 45–60 minutes per headlight. Cerakote wipe-on takes about 15 minutes for both. Know what you’re committing to.
How to Get the Best Results from Any Kit
The kit itself does only part of the job. Preparation determines whether results last weeks or years.
Start by washing the entire front of the car thoroughly. Use the best pressure washer gun for car detailing to remove embedded grime around the lens housing. Mineral deposits from hard water can interfere with compound adhesion — using the best water deionizers for car washing reduces this risk during the rinse stage.
Dry the lens fully before starting. Best air blowers for car detailing work faster than towels and eliminate trapped moisture in the lens housing edges. For wiping down surfaces, best microfiber towels for car detailing prevent micro-scratches during the prep phase.
Mask the paint around each headlight. Use at least two layers of painter’s tape. Abrasive compound on bare paint causes damage that’s harder to fix than the headlights themselves.
Follow each sanding stage in order. Skipping grits leaves deep scratches that the polishing compound can’t remove. For front-end prep, check our guide to the best bug remover for cars to clear bug splatter before sanding. Our guides to the best car wash soap for hard water and best pressure washers for cars also help if you’re tackling a full exterior session first.
Apply the UV coat in thin, even passes. Let each pass cure before adding another. Rushing this step is the most common reason restorations fade ahead of schedule. For a thorough front-end clean, our guide on the best car wheel brushes can help you tackle the full detail at the same time.
See which headlight restorer works best in Popular Mechanics’ hands-on test for additional technique guidance across different product types.
Final Verdict: Which Headlight Restoration Kit Should You Buy?
Here’s the short answer by driver type:
- Want the best overall result? Choose Cerakote. Fastest application, longest-lasting ceramic protection.
- Heavily oxidized headlights? Choose the 3M system. Nothing cuts through serious damage like its sanding progression.
- Prioritize UV durability? Choose Sylvania. The UV coat is its standout advantage.
- First-time DIYer? Choose Mothers NuLens. Forgiving technique, reusable, and reliable results.
- Tightest budget? Choose Turtle Wax — but only for light haze.
- Want speed on moderate oxidation? Choose Meguiar’s Heavy Duty.
- Focused on long-term protection? Choose Rust-Oleum for its coating-first approach.
Don’t overthink it. Assess your headlight condition, match it to the kit type above, and prep the surface properly. That combination delivers better results than any premium kit applied carelessly to a dirty, unmasked lens.
Clear headlights aren’t a luxury. They’re a safety feature — and restoring them yourself takes less than an hour.