How to Remove White Spots on Car Paint: Step-by-Step Guide (No Damage)

White spots on your car’s paint can be frustrating and unsightly, but they’re not necessarily permanent. Whether caused by hard water, environmental contaminants, or improper washing techniques, these spots can often be removed safely at home with the right approach. This comprehensive guide will walk you through proven methods to restore your car’s finish without damaging the paint or clear coat.
What Causes White Spots on Car Paint?
Understanding the root cause of white spots is crucial for choosing the most effective removal method. These spots typically fall into several categories, each requiring a slightly different approach.
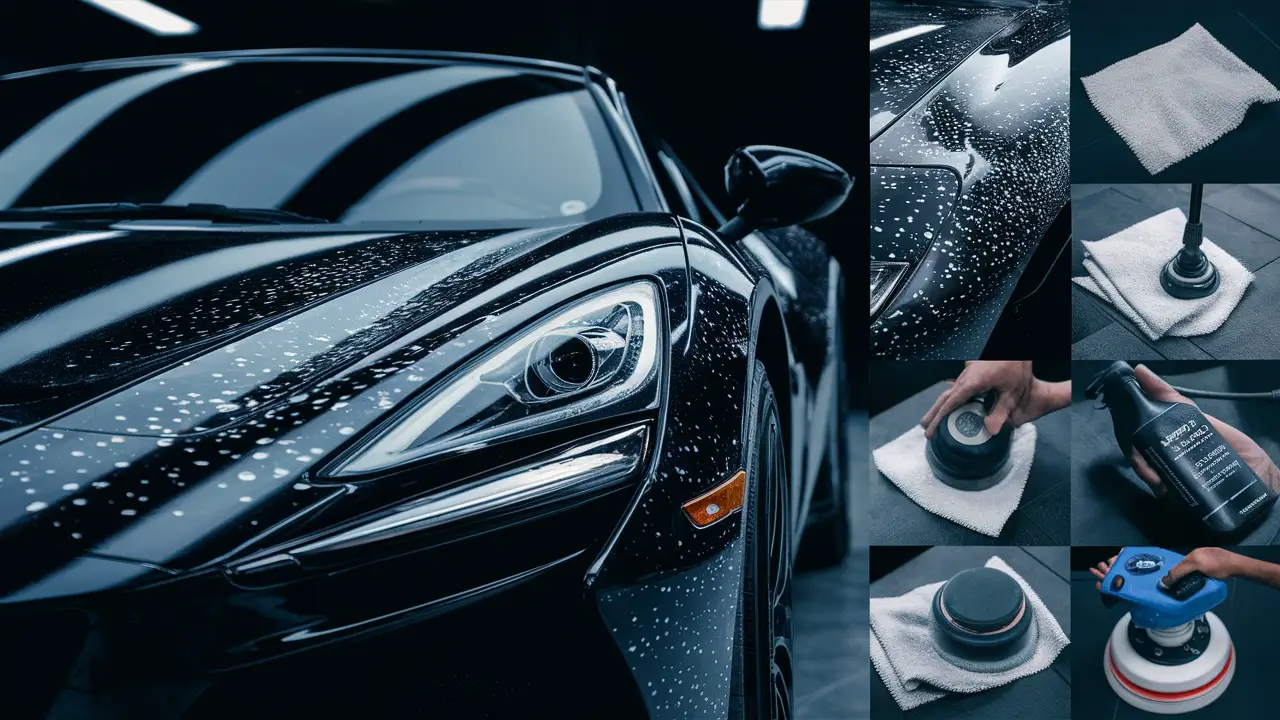
Water spots are the most common culprit, caused by mineral deposits left behind when hard water evaporates on your car’s surface. Hard water contains dissolved calcium and magnesium ions that form a chalky, white residue. According to Car and Driver water spot statistics, over 60% of car owners in areas with hard water experience recurring white spot issues.
Oxidation spots occur when the clear coat begins to break down due to UV exposure and environmental factors. These appear as white or chalky patches and indicate more serious paint damage that requires immediate attention.
Environmental contaminants such as tree sap, bird droppings, and road salt can also cause white residue. Bird droppings are particularly problematic as their acidic nature can etch into the paint if left untreated for extended periods.
Quick Diagnosis Checklist:
- Touch the spot: Raised bumps suggest contaminants; flat spots indicate mineral deposits
- Location pattern: Spots on horizontal surfaces usually mean water spots
- Color intensity: Bright white suggests fresh minerals; dull white may indicate oxidation
- Texture: Rough spots need clay bar treatment; smooth spots may respond to chemical removal
The impact on your car’s clear coat varies by cause and duration. Fresh water spots only affect the surface, while etched spots penetrate deeper layers. Left untreated, these spots can lead to permanent paint damage requiring professional correction or repainting.
For a deeper understanding of the various causes and initial prevention strategies, check out our detailed guide on white spots on car paint removing.
Tools and Supplies You’ll Need
Success in removing white spots depends heavily on having the right tools and products. Here’s a comprehensive list organized by treatment level and budget considerations.
Essential Items (Budget-Friendly):
- Microfiber cloths (at least 6 clean ones)
- pH-neutral car soap
- White vinegar (distilled preferred)
- Spray bottles for solutions
- Clean water source
- Soft-bristled detailing brush
Intermediate Supplies:
- Clay bar kit with lubricant
- Polishing compound (medium cut)
- Foam applicator pads
- Car wax or sealant
- Detailing spray for quick touch-ups
Advanced Tools:
- Dual-action polisher
- Professional-grade compounds
- Water deionizer system
- Air blower for spot-free drying
- Paint thickness gauge
The quality of your water source significantly impacts both spot formation and removal success. Understanding car cleaning water quality science helps explain why some areas are more prone to water spots and why deionized water works better for final rinses.
Safety gear should never be overlooked. Wear nitrile gloves when handling chemicals, and work in shaded areas to prevent products from drying too quickly on hot surfaces.
Budget vs. Professional Products: While expensive detailing products often perform better, many DIY solutions work effectively for mild to moderate spots. Start with vinegar solutions and basic clay bars before investing in premium compounds.
Most supplies can be sourced from auto parts stores, though online retailers often offer better prices for complete kits. Local detailing shops sometimes sell professional products to consumers and can provide valuable advice.
Step 1: Wash the Car Thoroughly
A proper wash is the foundation of successful spot removal. This step removes loose dirt and debris that could scratch the paint during subsequent treatment steps.
Pre-Rinse Assessment:
Start with a thorough rinse using a high-pressure water gun to remove loose contaminants. This initial rinse also helps you assess the severity and distribution of white spots across the vehicle.
Two-Bucket Method:
Use the two-bucket washing technique to minimize the risk of introducing new scratches:
- Fill one bucket with soapy water (pH-neutral car soap)
- Fill the second bucket with clean rinse water
- Wash one panel at a time, rinsing your mitt in the clean water bucket before reloading with soap
This method is particularly important when dealing with spotted paint, as existing mineral deposits can act like sandpaper if redistributed by a dirty wash mitt.
Water Usage Considerations:
Be mindful of how many gallons of water to wash a car efficiently while ensuring thorough cleaning. Typically, 20-30 gallons suffice for a complete wash when using proper techniques.
Critical Drying Technique:
How you dry the car after washing is crucial for preventing new spot formation. Avoid air-drying, which allows minerals to re-deposit. Instead:
- Use clean, plush microfiber drying towels
- Work in shaded areas
- Consider using air blowers for car detailing for completely touchless drying
- Pat rather than drag the towel across surfaces
If white spots remain visible after washing and drying, proceed to the next treatment steps. Some spots may appear less prominent when wet but become obvious again once dry.
Step 2: Test Vinegar Solution on White Spots
Vinegar is often the first line of defense against mineral-based white spots due to its acidic nature, which dissolves calcium and magnesium deposits. However, proper technique and testing are essential to avoid paint damage.
Mixing the Solution:
Create a 50/50 mixture of distilled white vinegar and distilled water in a clean spray bottle. For stubborn spots, you can increase the vinegar concentration to 70%, but never use undiluted vinegar on car paint. The user-tested vinegar ratios from detailing pros show that stronger solutions don’t always work better and can damage certain paint types.
Test Area First:
Always test the solution on an inconspicuous area first, such as the lower section of a door jamb. Spray a small amount and let it sit for 2-3 minutes, then wipe clean with a microfiber cloth. If there’s no adverse reaction, proceed with treatment.
Application Technique:
- Work on cool surfaces in shade to prevent rapid evaporation
- Spray the solution directly onto spotted areas
- Allow 3-5 minutes dwell time for light spots, up to 10 minutes for heavy deposits
- Agitate gently with a soft microfiber cloth using circular motions
- Rinse thoroughly with clean water
- Dry immediately with a clean towel
When Vinegar Works vs. When to Stop:
Vinegar is most effective on fresh, surface-level mineral deposits. You should see spots dissolving or becoming easier to wipe away within the first few minutes. If spots remain unchanged after two applications, discontinue use and move to mechanical removal methods.
Warning Signs to Stop:
- Paint appears dull or loses gloss
- Any color change in the paint
- Spots seem to get worse rather than better
- The clear coat feels rough after treatment
Never let vinegar solution sit longer than 10 minutes, and always neutralize with thorough water rinsing followed by pH-neutral soap if needed.
Step 3: Use Clay Bar for Stubborn Spots
When chemical methods fail, mechanical removal with a clay bar can safely eliminate bonded contaminants and embedded mineral deposits. Clay bars work by physically pulling contaminants from the paint surface without scratching.
Preparation and Safety:
Ensure the car is completely clean and cool to the touch. Clay should never be used on hot surfaces or dirty paint, as this increases the risk of marring. Keep your clay bar clean by folding and kneading it frequently to expose fresh surfaces.
Lubrication is Critical:
Never use clay without proper lubrication. Options include:
- Dedicated clay lubricants (most effective)
- Quick detailing sprays
- Soapy water as a budget alternative
Spray lubricant generously on both the paint surface and the clay bar. The surface should remain slippery throughout the process.
Proper Clay Bar Technique:
- Work on 2×2 foot sections at a time
- Glide the clay across the surface with light pressure
- Use straight-line motions rather than circular ones
- Re-lubricate frequently to maintain slip
- Check progress by running your hand over the treated area
Expected Results:
For mild spots, clay should remove contaminants in 2-3 passes. More severe spots may require several passes but should show gradual improvement. The before-and-after water spot photos demonstrate typical results you can expect from proper clay bar technique.
Common Pitfalls to Avoid:
- Using insufficient lubrication (causes scratching)
- Pressing too hard (unnecessary and potentially damaging)
- Continuing to use contaminated clay
- Working in direct sunlight
- Skipping the final wipe-down with clean microfiber
When Clay Bar Isn’t Enough:
If white spots remain after thorough clay treatment, they’re likely etched into the clear coat. This indicates the need for polishing compounds or professional correction. Don’t continue with more aggressive clay work, as this won’t improve deeply etched spots.
After successful clay treatment, the paint should feel smooth, and spots should be significantly reduced or eliminated. Always follow up with wax or sealant to protect the freshly cleaned surface.
Step 4: Polish and Wax for Protection
Polishing addresses spots that have etched into the clear coat, while waxing protects against future contamination. This step requires careful product selection and technique to avoid paint damage.
Choosing the Right Compound:
For oxidation and etched spots, select compounds based on severity:
- Light oxidation: Fine polish or cleaner wax
- Moderate spots: Medium-cut compound
- Heavy oxidation: Compound followed by polish
The Meguiars polishing guide provides excellent technical information on matching products to paint conditions.
Hand vs. Machine Application:
Hand polishing works well for small areas and light correction:
- Apply the compound to the foam applicator pad
- Work into paint using overlapping circular motions
- Apply moderate pressure, letting the product do the work
- Remove residue with a clean microfiber cloth
Machine polishing (dual-action polisher) is more effective for larger areas:
- Use appropriate pad stiffness for your compound
- Start with the lowest speed settings
- Keep the machine moving to prevent heat buildup
- Work in 2×2 foot sections
Buffing Process:
Whether working by hand or machine:
- Work on cool surfaces in shade
- Apply thin, even layers of product
- Allow a slight haze to form before removal
- Remove residue promptly with a clean microfiber
- Inspect results and repeat if necessary
Protection Step – Sealing with Wax:
After successful spot removal and polishing:
- Ensure the surface is completely clean and dry
- Apply quality carnauba wax or synthetic sealant
- Follow product-specific cure times
- Buff to high gloss with clean microfiber
Consider ceramic coatings for longer-lasting protection, especially in areas prone to hard water spots. These provide superior resistance to mineral deposits and environmental contaminants.
Quality Control:
Inspect your work in different lighting conditions. Some defects only become visible under direct sunlight or artificial lighting. Address any remaining spots before applying protection products.
Step 5: Professional Options If DIY Fails
Sometimes white spots are too severe or extensive for DIY removal. Recognizing when to seek professional help can save time, money, and prevent further paint damage.
When to Call Professionals:
- Spots remain after multiple treatment attempts
- Large areas of oxidation or etching
- Paint shows signs of clear coat failure
- You’re uncomfortable working with power tools
- The vehicle has premium or specialty paint
What Professional Services Offer:
Professional detailers have access to:
- Multi-stage compound systems
- Rotary and forced rotation polishers
- Paint thickness measurement tools
- Wet sanding capabilities for severe cases
- Ceramic coating application
Cost Expectations:
Professional spot removal typically ranges from $150-500 depending on:
- Extent of damage
- Vehicle size
- Geographic location
- Level of correction required
Paint correction services may cost $500-1500 for complete vehicle treatment, while spot repainting can range from $200-800 per panel.
Choosing the Right Professional:
Look for detailers with:
- Certified training credentials
- Portfolio of similar work
- Paint thickness measurement capabilities
- Warranty on services
- Proper insurance coverage
Prevention Planning Post-Treatment:
Professional services often include maintenance advice and product recommendations. Develop a prevention strategy that includes regular washing schedules, proper drying techniques, and protective product application.
Some professionals offer maintenance packages that can prevent future spot formation through regular treatments and inspections. While more expensive upfront, these can be cost-effective for vehicles exposed to harsh water conditions.
Pro Tips to Prevent White Spots Recurrence
Prevention is always more effective and economical than removal. Understanding the science behind spot formation helps implement effective prevention strategies.
Water Quality Solutions:
The most effective prevention involves addressing water quality at the source. Best water deionizers for car washing remove dissolved minerals that cause spots, essentially eliminating the problem rather than treating symptoms.
Installing a deionizing system provides:
- Completely mineral-free rinse water
- Spot-free air drying capability
- Reduced the need for drying towels
- Long-term cost savings on products and treatments
Advanced Drying Techniques:
Traditional towel drying, even with high-quality microfiber, can leave microscopic water droplets that create spots. Best air blowers for car detailing provide completely touchless drying that eliminates this risk.
Strategic Washing Practices:
- Wash during cooler parts of the day
- Work in shaded areas when possible
- Rinse frequently during washing to prevent soap spots
- Use filtered water for final rinses when deionized water isn’t available
Maintenance Schedule:
Develop a routine based on your environment:
- Weekly washing in hard water areas
- Bi-weekly wax or sealant application
- Monthly clay bar treatment for high-contamination environments
- Quarterly professional inspection and correction
Protective Product Rotation:
Alternate between different types of protection:
- Carnauba wax for enhanced gloss
- Synthetic sealants for durability
- Ceramic coatings for maximum protection
- Quick detailing sprays for maintenance between washes
For comprehensive prevention strategies, including scientific explanations of how different water types affect your car’s finish, refer to our guide on car water spots causes prevention removal.
FAQ: Removing White Spots on Car Paint
Are white spots permanent?
Not necessarily. Fresh mineral deposits and surface contaminants can usually be removed with proper techniques. However, spots that have etched into the clear coat may require professional correction or, in severe cases, repainting. The key is addressing spots quickly before they have time to bond permanently with the paint.
Is vinegar safe on all paint types?
While vinegar is generally safe on automotive clear coats when properly diluted and used correctly, some specialty finishes and wraps may be sensitive to acidic solutions. Always test in an inconspicuous area first, and never use concentrations stronger than 70% vinegar. Matte finishes and vinyl wraps require special care and may need alternative removal methods.
How long does the removal process typically take?
For light spots on a single panel, expect 30-60 minutes, including washing and protection steps. Complete vehicle treatment with multiple methods can take 4-8 hours spread over a weekend. Severe cases requiring wet sanding or professional correction may need several days. Factor in cure times for waxes and sealants when planning your timeline.
What are the best products for black cars?
Black paint shows white spots more prominently but responds to the same removal techniques. Use extra care with polishing compounds, as swirl marks are more visible on dark colors. High-quality microfiber cloths and proper lighting during work are essential. Consider synthetic sealants over carnauba wax, as they provide more durable protection with less frequent reapplication.
How do I tell the difference between white spots and clear coat peeling?
Clear coat failure appears as flaking, peeling, or areas where the paint looks distinctly different in texture and color. White spots from minerals or contaminants sit on top of intact clear coat and can often be felt as raised areas. If you can scrape material off with your fingernail, it’s likely a contaminant rather than paint failure. Clear coat damage requires professional attention, while surface spots can often be removed at home.
Can I prevent spots while washing with hard water?
Yes, through several strategies: work in small sections and dry immediately, use the best water deionizer for car washing for final rinses, add water softening agents to your wash solution, or consider waterless washing products in extremely hard water areas. The key is never letting hard water air-dry on your vehicle’s surface.
Final Thoughts
White spots on car paint are a common but manageable problem. With the right knowledge, tools, and techniques, most spots can be safely removed at home. Remember that prevention through proper washing techniques and water quality management is always easier than removal.
When in doubt, consult with professional detailers to avoid costly paint damage. Regular maintenance and prompt attention to new spots will keep your vehicle looking its best for years to come.