How to Remove Car Wax Safely: Easy Steps for Paint, Trim, and Glass

Removing car wax safely starts with a thorough wash and dry. For light residue, a clean microfiber towel and a compatible detailing product do the job. For stubborn film, you’ll escalate to a pre-wax cleaner or lubricated clay bar — but paint, black plastic trim, rubber, and glass each need a different approach. Always test stronger products in a hidden spot first.


What You Need to Remove Car Wax
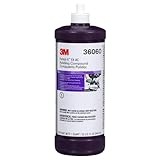
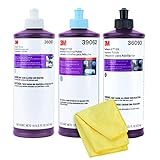
Gathering the right tools before you start saves time and protects your finish. Using the wrong materials — even on the first wipe — can scratch clear coat or streak trim.
Essential supplies:
- Two clean wash buckets and a wash mitt
- pH-balanced car shampoo
- Clean the best microfiber towels for car detailing — dedicate separate towels to paint, trim, and glass
- Pre-wax cleaner or dedicated wax remover
- Clay bar and clay lubricant or suitable detailing spray
- Soft detailing brush for seams, emblems, and panel gaps
- Glass-safe cleaner for windows and windshields
- Trim-safe cleaner for plastic and rubber surfaces
Optional but helpful:
- Low-pressure spray bottle for applying product to towels
- Masking tape to protect rubber edges near painted panels
- Isopropyl alcohol (70% solution) for trim, tested first
Having a second towel ready for final buffing is non-negotiable. One towel picks up residue; the second removes the last trace of film.
Prepare the Car Before Removing Wax
This step determines how much damage you risk on the next one.
Work in shade on cool panels. Hot paint dries the product too fast, leaving streaks that are harder to remove than the original wax. AAA’s automotive cleaning and detailing guidance specifically recommends cool, shaded conditions and thin wax application to protect the finish and simplify removal later.
Wash the vehicle thoroughly using a two-bucket wash method. If you don’t have hose access, a rinseless-wash setup works well — read our guide on how to wash a car without a hose for the full process. If you’re using a pressure washer for pre-rinse, check what PSI pressure washer for a car to avoid damaging the paint or stripping trim before you’ve even started.
Dry the car completely with a clean microfiber towel.
How to Tell Wax Residue From Paint Oxidation
Inspect the surface under good lighting at a low angle. Wax haze is usually a thin, oily film that wipes away with light pressure. Oxidation looks chalky and dull — it doesn’t wipe off and requires polishing, not wax removal. Knowing the difference prevents you from using the wrong method.
Common mistake: Trying to rub dry wax off a dirty panel. Dust and grit act like sandpaper on clear coat. Always wash first.
Remove Light or Excess Wax From Painted Panels
This is your first line of attack. Start gently.
Apply a quick detailer or compatible wax-removal product to a clean microfiber towel — not directly to the panel. Work one panel at a time using straight, overlapping passes. Don’t scrub in circles; circular motion on wax residue can create swirl marks.
Turn the towel frequently to expose a clean face. This matters more than most guides admit. A saturated towel simply spreads dissolved wax across the surface instead of lifting it. The microfiber towel technique for removing wax described in Mothers’ detailing guide confirms that towel rotation is as important as the cleaning product itself.
Buff lightly with a second dry towel to remove any remaining film.
If you’re unsure whether you’re dealing with wax buildup, bug residue, or tar, check our best bug remover for cars guide — the removal method differs significantly, and using the wrong product wastes time.
Common mistake: Using one saturated towel across the entire car. It won’t work. Rotate constantly.
Use a Pre-Wax Cleaner for Stubborn Wax Film
A pre-wax cleaner dissolves old or thick wax chemically. That’s faster and safer than mechanical force.
For surface-specific car wax removal methods, a dedicated pre-wax cleaner is the right escalation step after microfiber wiping fails. Test the product on a hidden area — inside a door jamb or under a sill — before applying it to visible panels.
Apply the cleaner to a clean microfiber towel or foam applicator pad. Work in straight lines with light pressure. Follow the product’s recommended dwell time precisely — leaving it longer won’t clean better, and it increases the risk of drying on the surface. Wipe residue away with a fresh towel.
Keep the cleaner off rubber trim and unpainted plastic unless the label explicitly confirms compatibility. Some paint-safe formulas react badly with porous surfaces.
Decision table: match your problem to the right method
| Problem | First method | Escalation method | Main caution |
|---|---|---|---|
| Light haze on paint | Microfiber + quick detailer | Pre-wax cleaner | Avoid dry scrubbing |
| Thick or persistent paint film | Pre-wax cleaner | Clay bar | Keep surface lubricated |
| White residue on black trim | Damp towel + soft brush | Trim-safe cleaner or tested IPA | Test first |
| Wax on glass | Glass-safe cleaner | Dedicated glass residue remover | Use a separate towel |
| Wax in seams and emblems | Soft detailing brush | Carefully applied cleaner | Avoid flooding gaps |
Common mistake: Assuming a strong degreaser is safe on all exterior surfaces. It isn’t.
Remove Bonded Wax With a Clay Bar
Clay bars remove contamination bonded to the paint surface — not just sitting on top.
Use clay only after washing. Never clay a dry or dusty panel. Apply clay lubricant or a suitable detailing spray generously to a small section — roughly 30 x 30 cm at a time. Use light pressure and short, straight passes. The clay should glide. If it drags, add more lubricant.
Fold the clay bar frequently to expose a clean face. If the clay falls on the ground, throw it away. Floor grit embeds in clay instantly, turning it into an abrasive that will score your clear coat.
Wipe lubricant and lifted residue away with a clean microfiber towel after each section. Run your fingertips across the surface through a plastic bag — if it feels smooth, the section is done.
Common mistake: Claying without enough lubricant. You’ll feel it. The clay will drag, the paint will heat up, and the result will be marring rather than contamination removal.
When Claying Is Unnecessary
Clay isn’t required for fresh or light wax residue. If a microfiber towel and quick detailer resolve the haze cleanly, skip the clay. Reserve it for persistent bonded contamination or when preparing paint for polishing or ceramic coating.
Remove Car Wax From Plastic Trim, Rubber, and Crevices
This is where most guides fall short. Porous black plastic absorbs wax. Scrubbing harder just drives it deeper.
Start with a damp microfiber towel or mild detailing spray. Work a soft detailing brush into textured plastic, panel gaps, badges, and seams with light circular pressure. This loosens residue without abrading the surface. Watch a demonstration of removing wax from crevices using a detailing brush, degreaser, and microfiber to see the technique in action.
For stubborn white wax residue on black trim, apply a trim-safe cleaner to your towel or brush — not directly to the surface. A carefully tested 70% isopropyl alcohol solution works on many trim types, but test it in a hidden area first. Some trims react to IPA by lightening in colour.
Wipe the area clean and dry it thoroughly after treatment. Apply a compatible trim protectant afterwards. If the trim still looks faded after cleaning, check our guide to the best car plastic restorer for a longer-term fix.
How to Clean Wax From Emblems and Panel Gaps
Apply cleaner to the brush, not into the gap. Flooding a seam pushes product behind panels where it dries and reappears later. Work from the outside edge inward, then wipe clean immediately.
Common mistake: Using a melamine sponge aggressively on textured plastic. It scours the surface texture and leaves a dull patch that no protectant can fix.
Remove Wax From Car Windows and Windshields
Wax on glass doesn’t just look bad. It creates a streaky film that scatters light at night and reduces visibility in rain.
Wash loose grit off the glass before touching it. Use a glass cleaner specifically labeled for wax or oily residue — standard glass sprays often smear rather than dissolve wax film. Work in small sections. Use a towel dedicated to glass only; a towel used on painted panels will transfer wax back onto the glass instantly.
For persistent windshield haze, our guide on how to clean windshield haze covers step-by-step methods that go beyond standard glass cleaner. If you’re unsure whether you’re seeing wax film or water spots, check our guide to car water spots causes prevention removal — the two look similar but need different treatments.
Inspect the glass against reflected light from a low angle. Remaining haze shows clearly this way.
Common mistake: Wiping glass with a greasy detailing towel. You won’t remove the wax — you’ll spread it.
What Not to Use When Removing Car Wax
Some shortcuts cause more damage than the original residue.
- Never scrape dried wax with a metal tool or razor blade
- Avoid abrasive kitchen scrubbers or scouring pads on any painted surface
- Don’t apply undiluted solvents unless the product is explicitly automotive-rated
- Avoid working in direct sunlight or on panels warm to the touch
- Don’t mix cleaning chemicals — the reactions are unpredictable on paint
- Never use the same towel on wheels, trim, glass, and paint
- Avoid using dish soap as a routine wax-removal method — it may strip protection but leaves residue and dries out rubber trim with repeated use
Simple. Disciplined. And it protects the finish you’re trying to restore.
Inspect the Finish and Reapply Protection
Check the finish under direct or angled light. Run clean fingertips across each panel. Remaining wax residue feels slightly slick or tacky compared to clean, bare paint.
If you spot swirl marks, light scratches, or dull patches after cleaning, that’s a correction job — not a wax-removal job. Read our guide on car polishing for beginners before reaching for a machine polisher. And if you’re trying to understand the difference between wax removal and paint correction, what does buffing a car do explains the process clearly.
For deeper scratches, our how to buff out scratches on a car guide covers the full DIY correction process. Those are separate tasks.
Apply new wax, paint sealant, or ceramic coating only once the surface is clean and completely dry. Keep product away from textured trim by masking tape edges or applying with careful brush control. Follow the new protection product’s curing and maintenance instructions — the complete exterior detailing process from AutoZone provides useful context for the full workflow.
Common mistake: Applying new wax over leftover residue. It traps streaks beneath the new layer and produces uneven gloss that gets worse with each additional coat.
Frequently Asked Questions About Removing Car Wax
Can dish soap remove car wax?
Strong dish soap will reduce or strip wax protection over time, but it doesn’t give you the surface control of a dedicated cleaner. It also dries out rubber trim and door seals with repeated use. Use a proper pre-wax cleaner for predictable results.
Does a clay bar remove wax?
Clay removes bonded surface contamination and may lift some wax in the process. It’s not the right first step for ordinary wax residue. Wash and wipe first. Escalate to clay only for contamination that survives a pre-wax cleaner.
Will removing wax damage the clear coat?
Gentle, compatible products won’t damage clear coat. The risk comes from abrasive tools, excessive pressure, contaminated towels, or harsh solvents used without testing. Follow the least-aggressive-first approach and you’ll be fine.
How do you remove wax from black plastic trim?
Start with a damp microfiber towel and a soft detailing brush. Escalate to a trim-safe cleaner or tested IPA solution if residue remains. Always apply product to the tool, not the surface. Finish with a compatible trim protectant.
Should you polish after removing wax?
Polishing is a correction step for defects and oxidation — not a standard part of wax removal. If the paint looks clean and clear after removing the wax, skip polishing entirely and move straight to reapplication.
Ready to Protect Your Paint Again
Removing car wax doesn’t need to be complicated. Wash first. Work from least aggressive to most. Match the product to the surface — paint, trim, glass, and crevices each need their own approach.
Use clean towels throughout, test chemicals in hidden areas, and inspect the finish before applying anything new. For most people, a good wash, a quality microfiber towel, and a pre-wax cleaner will handle 90% of wax removal jobs without any further escalation.